
MS製RPAツールである「Power Automate Desktop」を触り始めましたが、「Excelシートを順番に処理するには、どうすれば良いの?」という疑問が出たので、記事として纏めてみました。
※以下は、関連記事となります。(良ければ参考にしてください)


前提について
今回紹介するアクション等、説明を最小限に絞っています。(色々書くと、何を伝えたいのか、がボヤける為)
色々、補足すべき事項があったりしますが、まずは、触ってみる事に重点を置く、で良いと考えています。
下準備
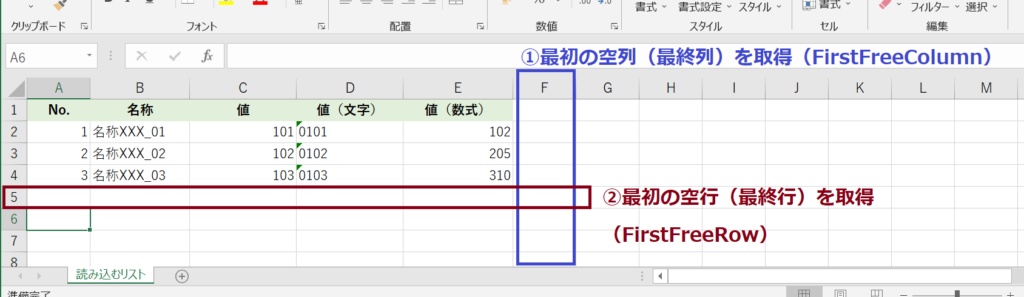
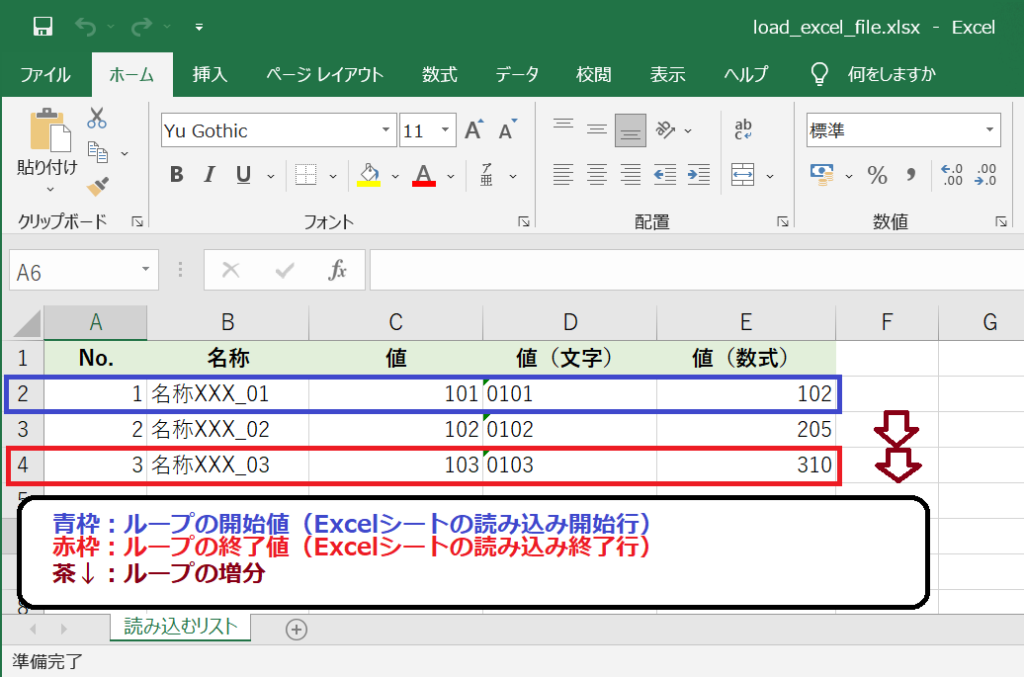
下準備として、以下のExcelファイルを作成したものと仮定します。
※補足として、C列「値」には数値、D列「値(文字)」は数値を文字として、E列「値(数式)」は数式(A列×C列+1)を入れています。
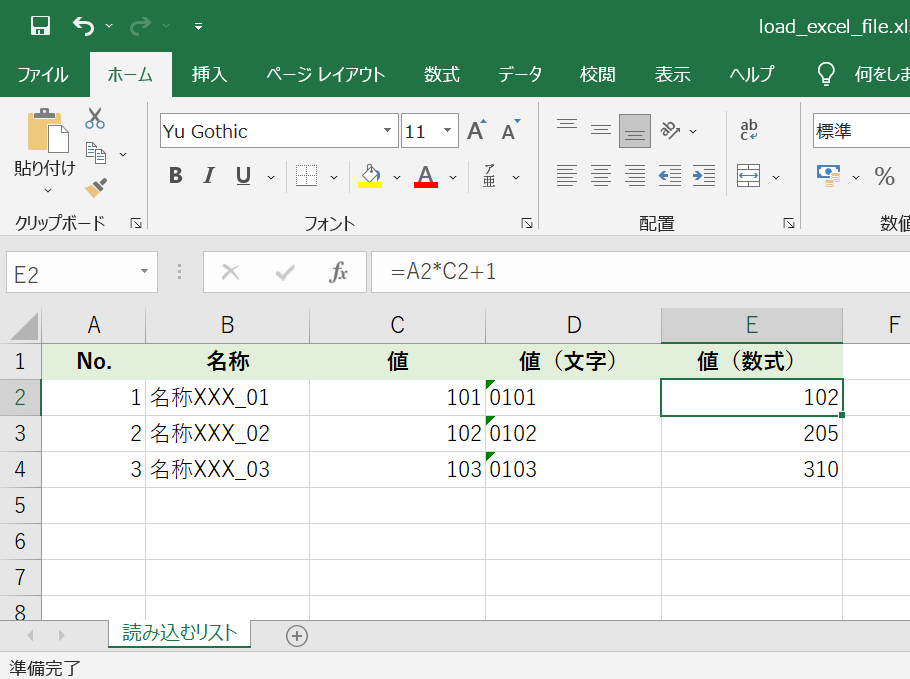
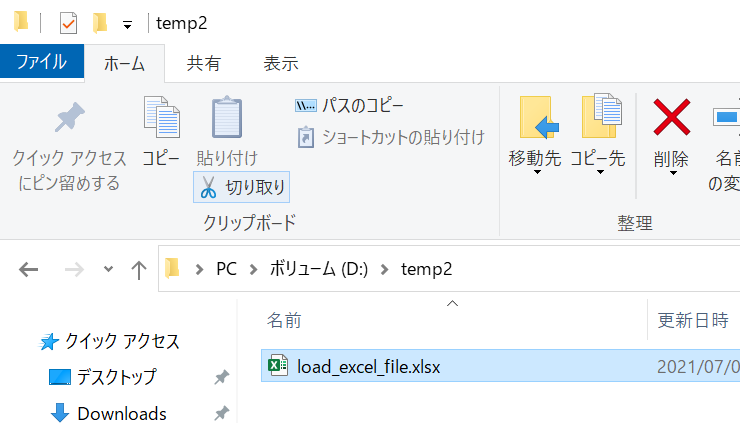
上記ファイル「load_excel_file.xlsx」を、Dドライブ「D:\temp2」配下に置きます。
まずの下準備は、これでOKです。
「Power Automate Desktop」の操作
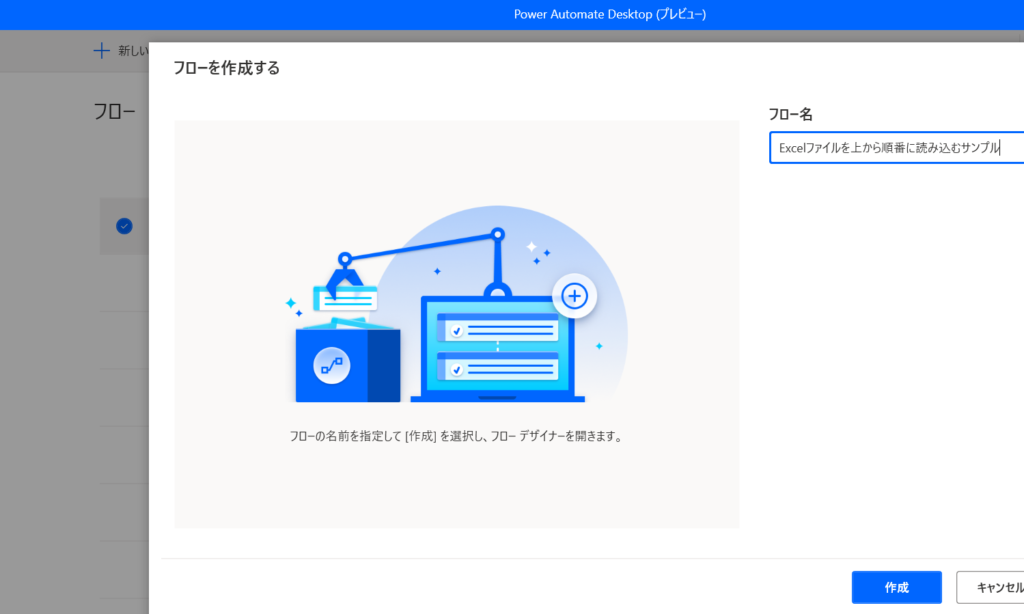
ここでは、新規にフローを作成します。
名前は好きなもので良いです。
アクションの作成
まずは、完成させたフローがありますので、それを元に説明を纏めています。
なお、今回のPower automateのアクション一式を、以下のコードに纏めました。
コードをコピーして「Power automate」に張り付ければ、アクション一式が追加されます。
※以降の手順が面倒な際は、ここでコピーして下さい。
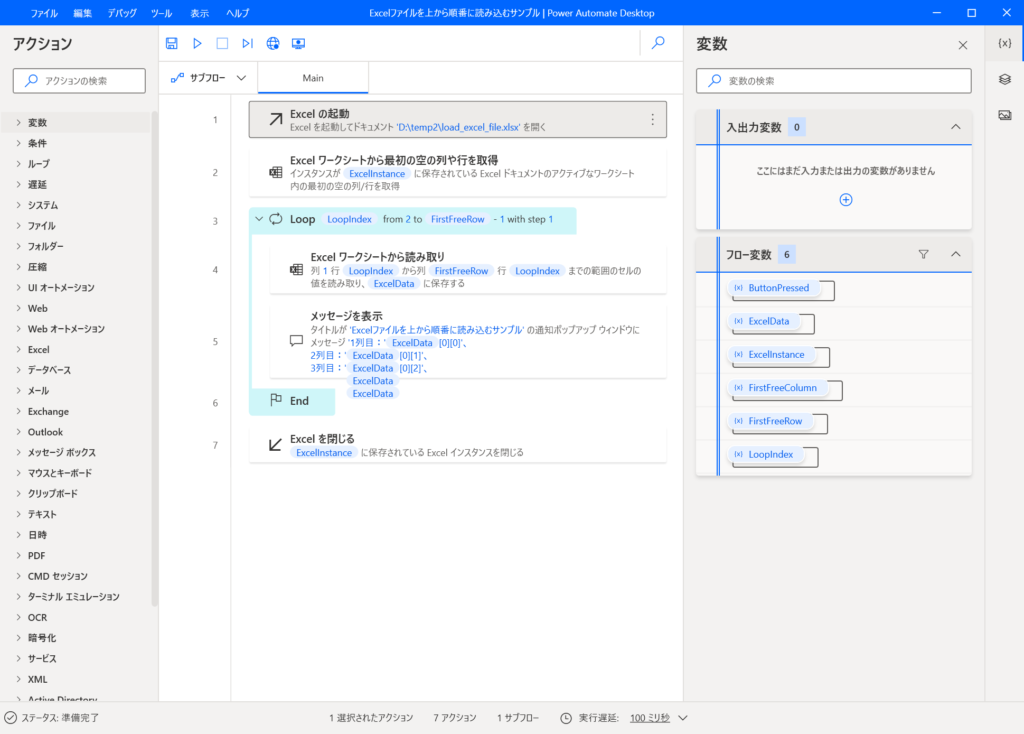
Excel.LaunchAndOpen Path: $'''D:\\temp2\\load_excel_file.xlsx''' Visible: True ReadOnly: False LoadAddInsAndMacros: False Instance=> ExcelInstance
Excel.GetFirstFreeColumnRow Instance: ExcelInstance FirstFreeColumn=> FirstFreeColumn FirstFreeRow=> FirstFreeRow
LOOP LoopIndex FROM 2 TO FirstFreeRow - 1 STEP 1
    Excel.ReadCells Instance: ExcelInstance StartColumn: 1 StartRow: LoopIndex EndColumn: FirstFreeRow EndRow: LoopIndex ReadAsText: False FirstLineIsHeader: False RangeValue=> ExcelData
    Display.ShowMessage Title: $'''Excelファイルを上から順番に読み込むサンプル''' Message: $'''1列目:%ExcelData[0][0]%、
2列目:%ExcelData[0][1]%、
3列目:%ExcelData[0][2]%、
4列目:%ExcelData[0][3]%、
5列目:%ExcelData[0][4]%''' Icon: Display.Icon.None Buttons: Display.Buttons.OK DefaultButton: Display.DefaultButton.Button1 IsTopMost: False ButtonPressed=> ButtonPressed
END
Excel.Close Instance: ExcelInstance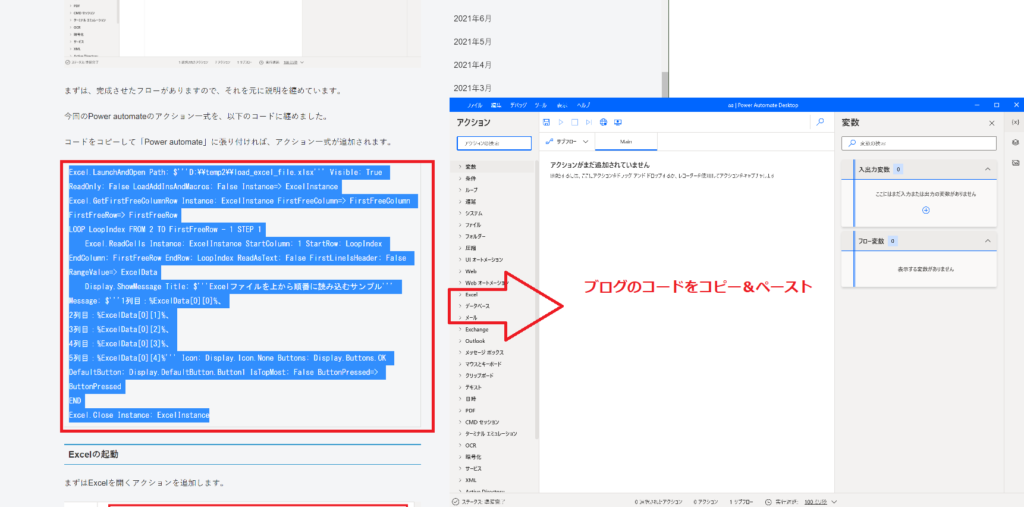
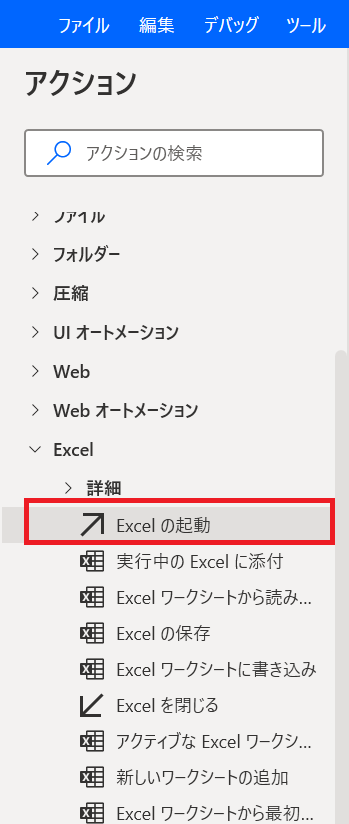
Excelの起動
まずはExcelを開くアクションを追加します。

左ツリーに「Excelの起動」があるので選択(ダブルクリック)します。
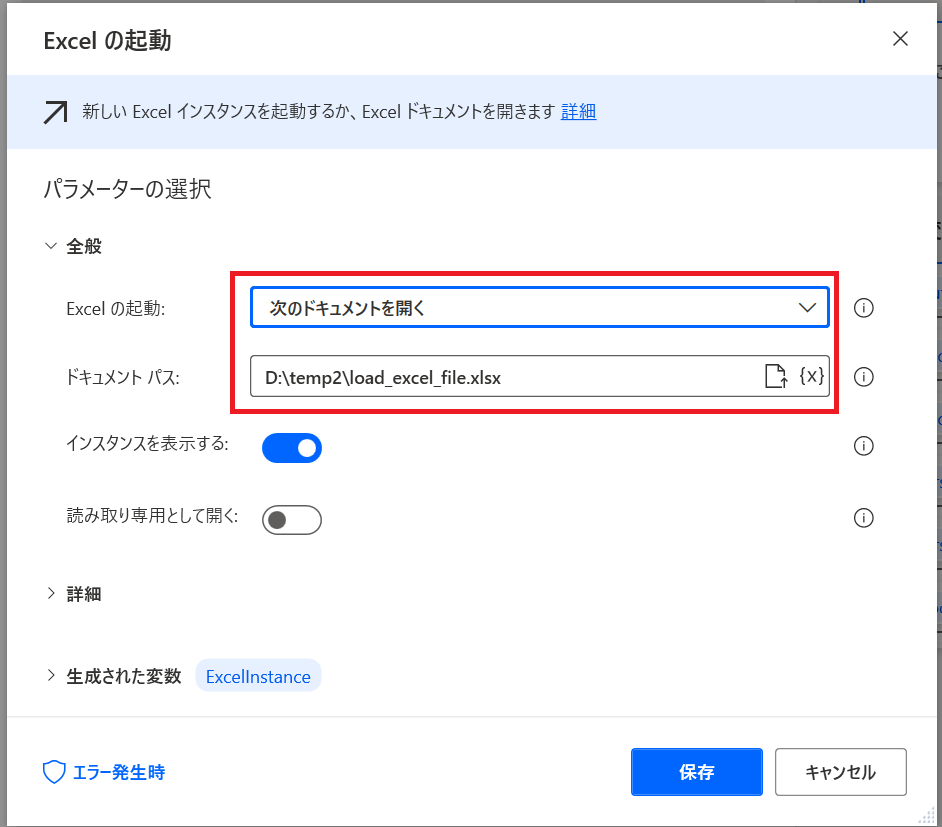
パラメータ選択で、以下の絵(赤枠)のように指定します。
※ここでは「下準備」で作成したExcelファイルを開いています。
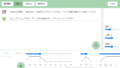
Excelワークシートから最初の空の列や行を取得

ここでは、Excelシート内の最初の空列、空行を取得しています。
取得する理由ですが、単にExcelシート内の最終列、最終行を取得しています。
※以下の絵を参照。
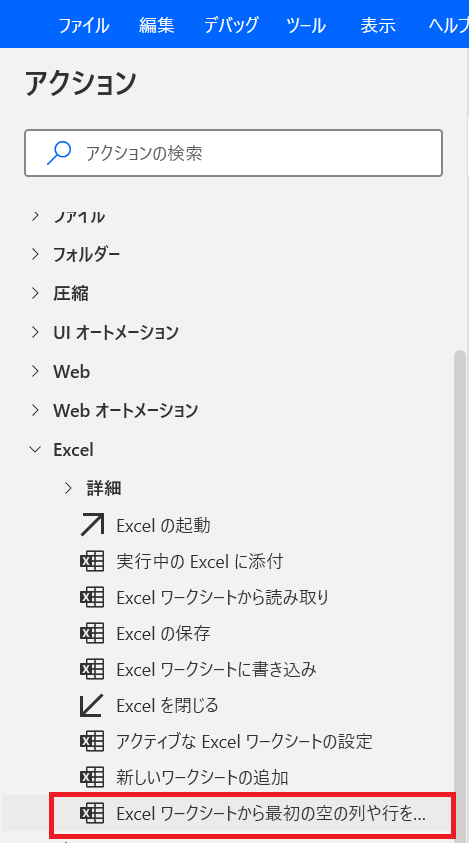
では、PowerAutomateの左ツリーから、先ほどの同様に「Excelワークシートから最初の空の列や行を取得」を選択してください。
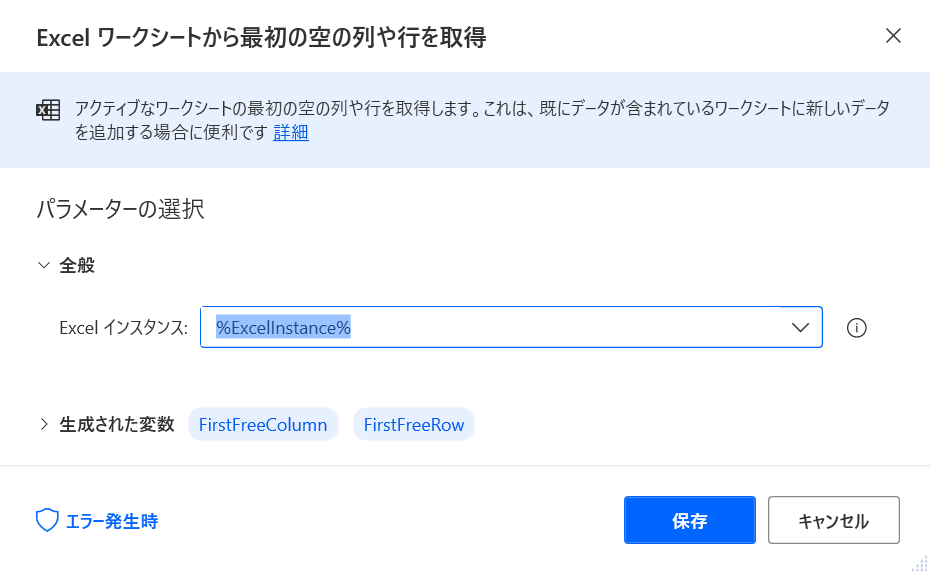
本アクションは、そのまま「保存」してください。
(デフォルトで、変数「FirstFreeColumn」「FirstFreeRow」が生成されます)
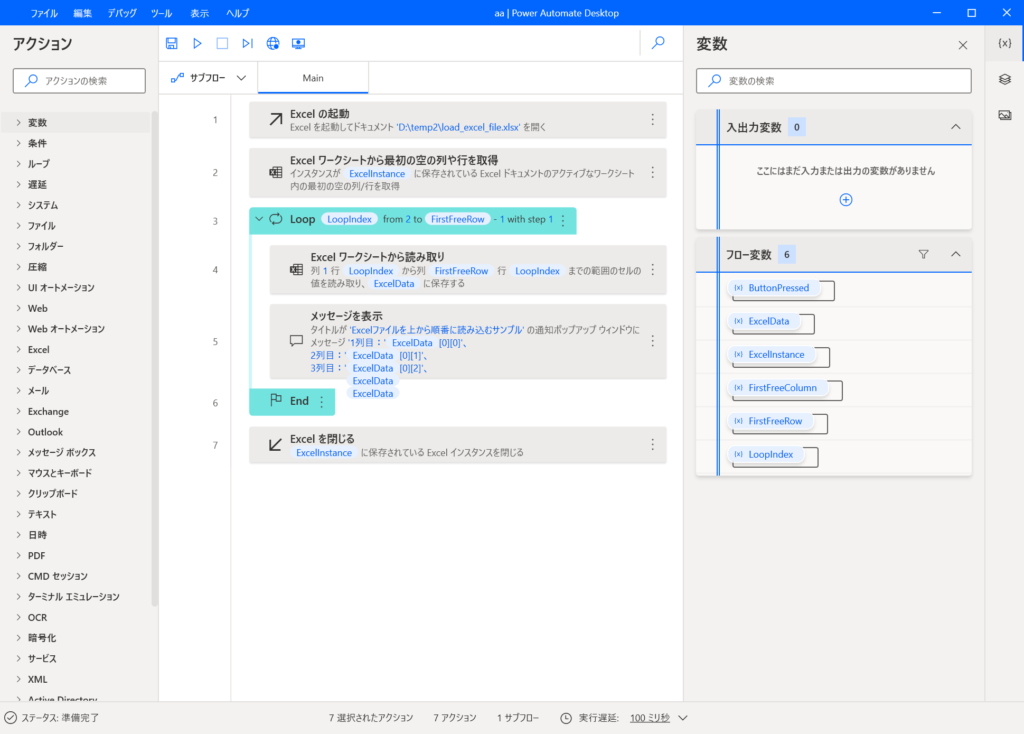
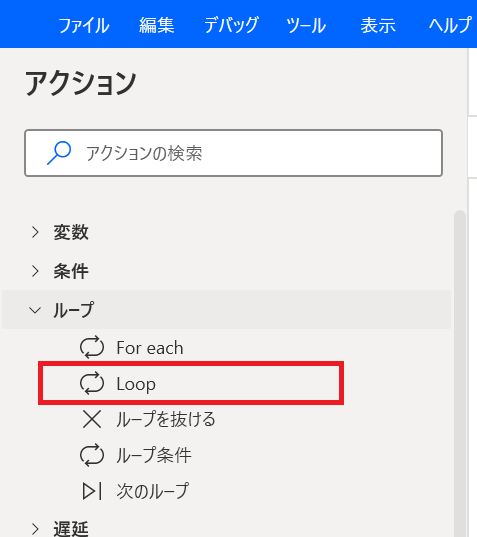
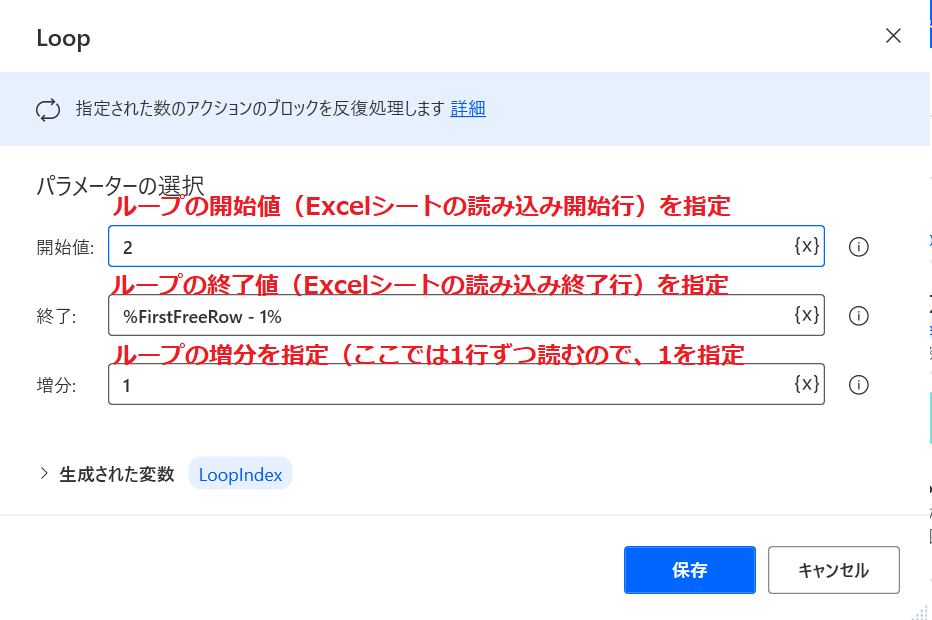
ループを作成
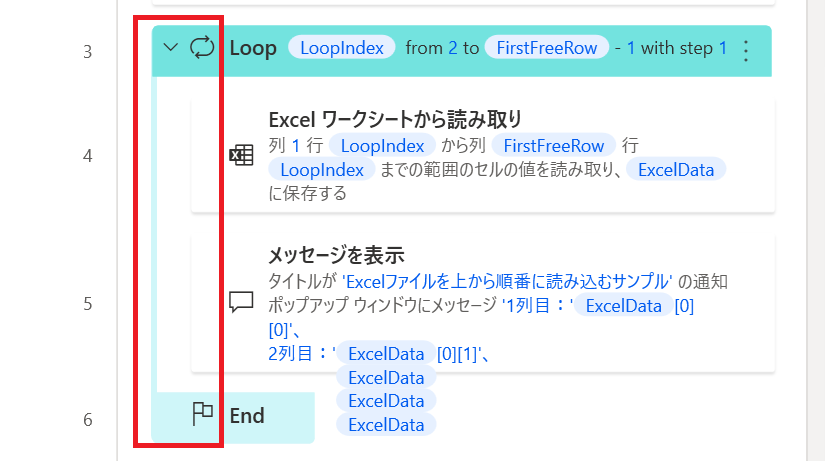
次はループを作成します。(Excelシートを1行ごとに処理させるために作ります)
アクションに「Loop」があるので選択します。
パラメータを以下を指定します。(赤枠参照)
Excelワークシートから読み込み
次はループ内のアクションを追加します。

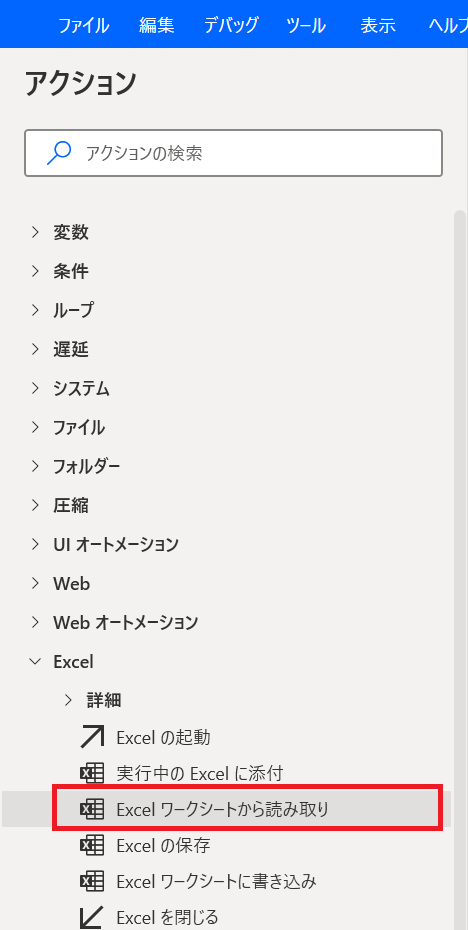
アクションに「Excelワークシートからの読み取り」があるので選択します。
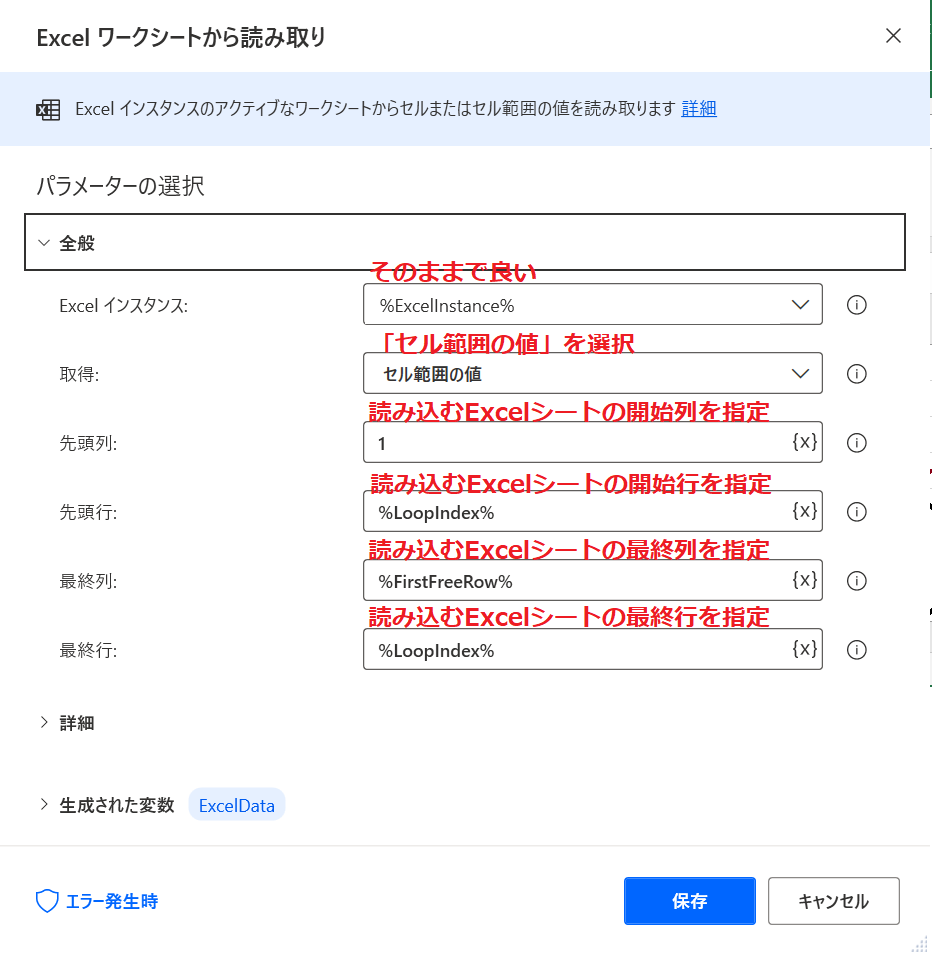
パラメータの補足ですが、「先頭行」と「最終行」に「%LoopIndex%」を指定してますが、これは、ループ内の変数(今、何行目を扱っているのか)になります。
ループは1行単位で処理する前提なので、1行分のみ読み込みます。(「先頭行」と「最終行」に同じ値を設定)
なお、このアクションで、変数「ExcelData」が生成されます。
この変数にExcelシートの情報が入っています。
メッセージを表示
次に、上で取得したExcelセルの内容を表示します。
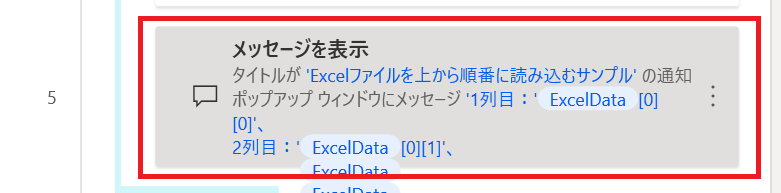
アクションに「メッセージの表示」があるので選択します。
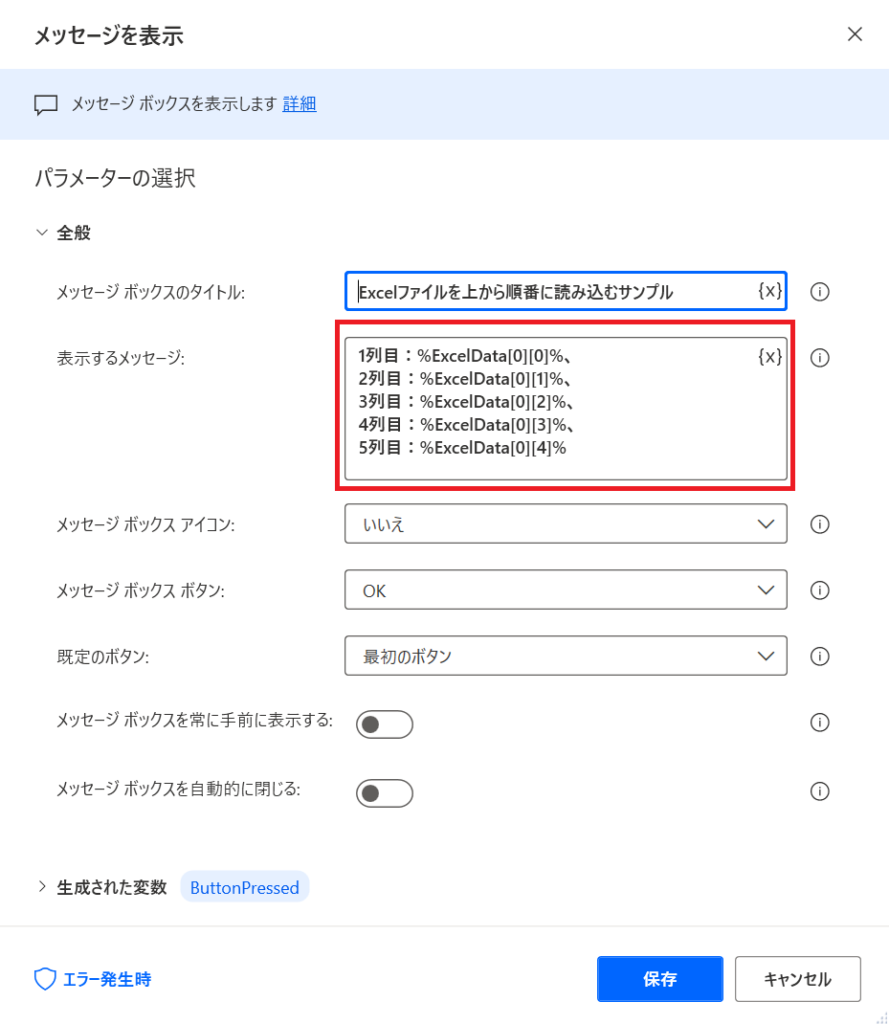
「表示するメッセージ」に、上で生成された変数「ExcelData」を指定しています。
なお、変数「ExcelData」は2次元配列(行と列のリスト)で設定されているので、値を取り出す際に、何行目の何列目であるか、を指定しています。
※1行ずつ読み込んでいるので、行は0固定を指定(「ExcelData[0][0]~「ExcelData[0][4]」)しています。
ここまでで、ループ内のアクションは終わりです。
Excelを閉じる
最後に、開いているExcelファイルを閉じるアクションを追加します。

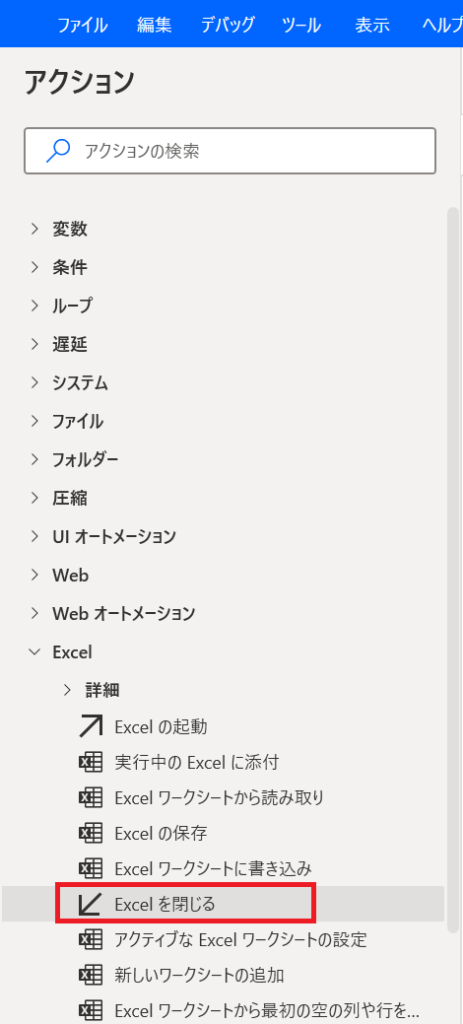
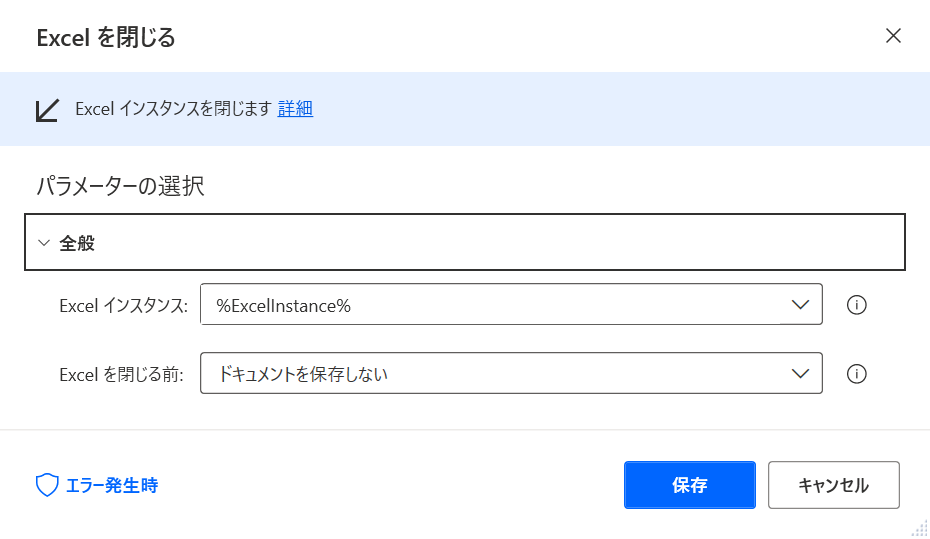
本アクションは、そのまま「保存」してください。
ここまでで、一通りのアクションの追加は終わりです。
お疲れさまでした!
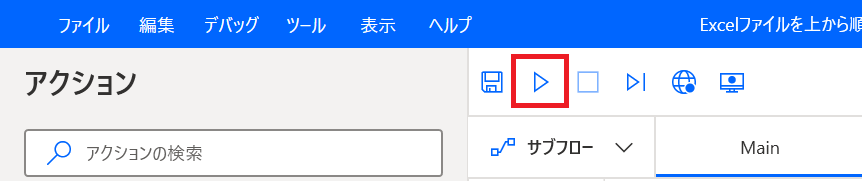
実際に動かしてみる
では、作成したアクションを実際に動かしてみましょう。
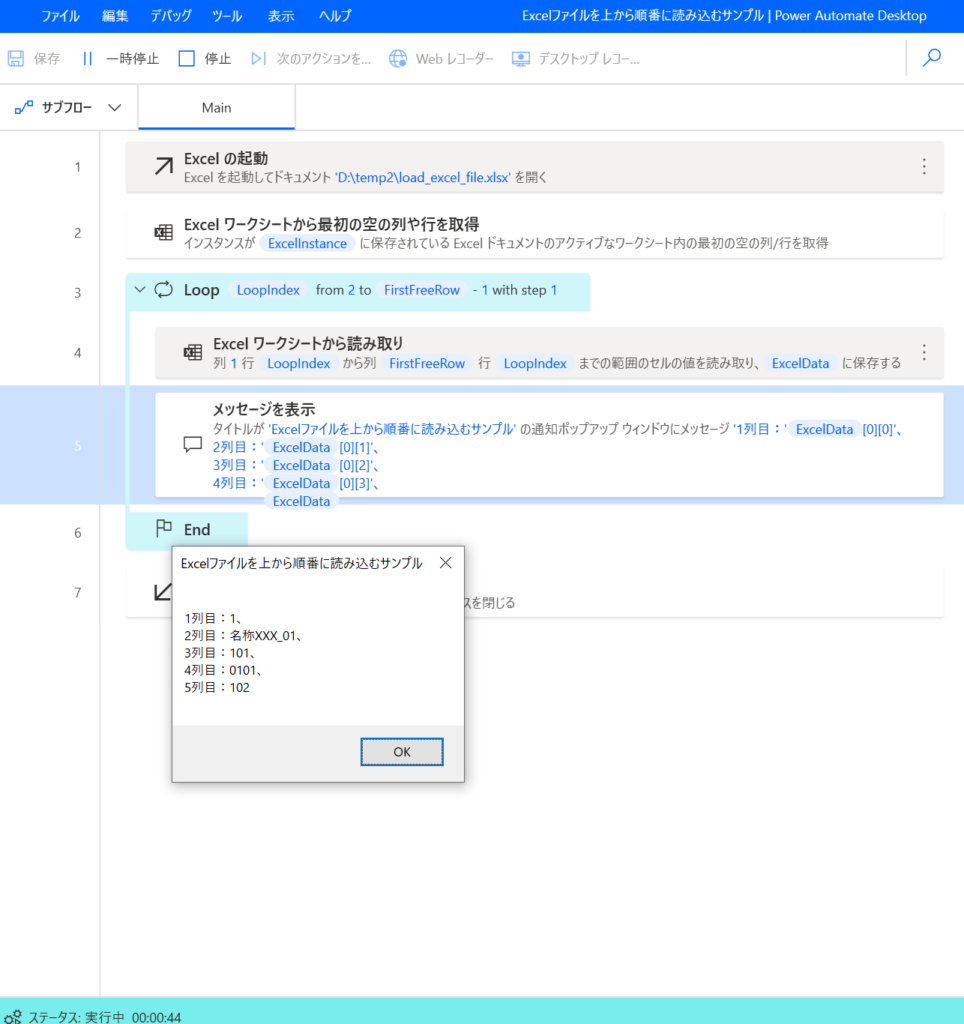
メッセージにExcelシートの内容が表示されているかと思います。
(メッセージを閉じると、次の行のメッセージが表示され、最後まで表示すると、Excelを閉じて終了すると思います)
まとめ
今回は「Power Automate Desktop」でExcelシートを上から順に読み込むサンプルを作成しましたが、如何だったしょうか。
Excelファイルを1行ずつ読み込んで処理させる、というケースは多いかと思いますので、1つ雛形を作成して、それを使いまわすようにすると、ラクが出来るのかな、と感じています。
この内容が少しでも参考になれば幸いです。

コメント